
This denim tote bag making is all about fun, playing with fabric and appreciating slow stitching, slow making – it is about the process as much as about the end result. It has to be, the amount of time it takes!!
I love working with denim, it is so versatile, readily available – just ask friends for their old worn out jeans. I often have donations of jeans but otherwise, you can easily find them at thrift stores, yard sale, or if you are in the UK like me ask for some from your local charity shops rag bag or visit a car boot sale.
If you are starting out on your bag-making journey check out my details Bag Making for Beginners ebook, with fiver reference chapters covering essential bag making skills followed by eight incremental bag patterns to hone your skills.


Personally I am rather passionate about bag making – if you are new to bag making I have the perfect Beginners Bag Making Course for you which covers so many essential skills for bag making, and includes many free bag tutorials.
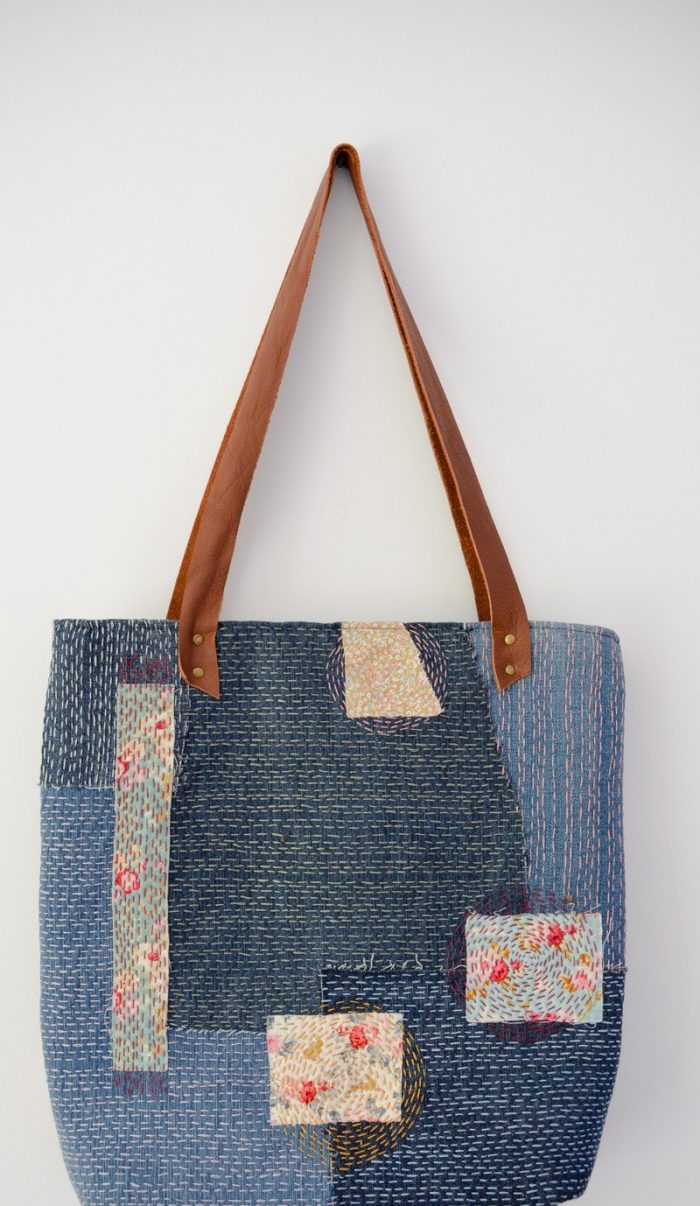
Sashiko Denim Tote Bag
This post contains Amazon affiliate links for your convenience. Click here to see my disclosure policy.
- Variety of denim
- Embroidery Floss Thread
- Cotton Scraps
- Cotton fabric for lining 5/8 yard or half a meter
- Annies Soft and Stable, two pieces 16 1/2 by 18 1/4″ (42 by 46 cm)
- Iron on Interfacing, two pieces 16 1/2 by 18 1/4″ (42 by 46 cm)
- Leather for leather straps, each measuring 31″ by an 1″
- Leather hole punch
- Double cap rivets
- Scissors

Denim tote bag
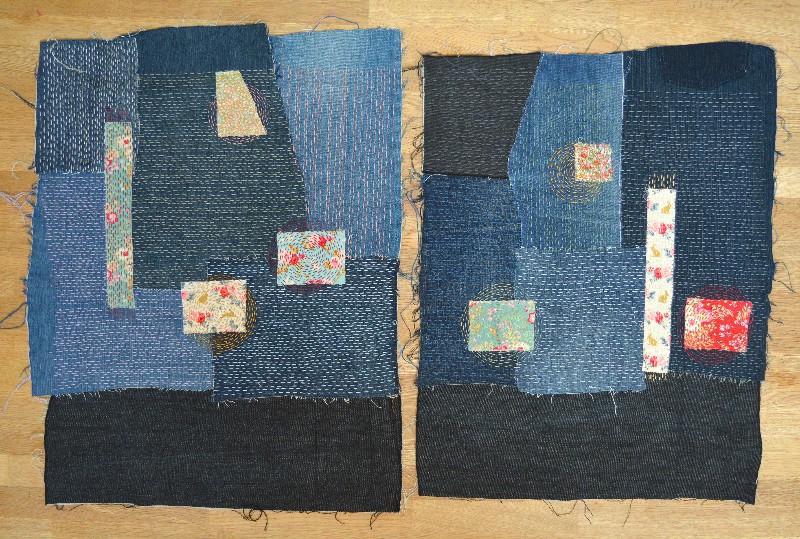
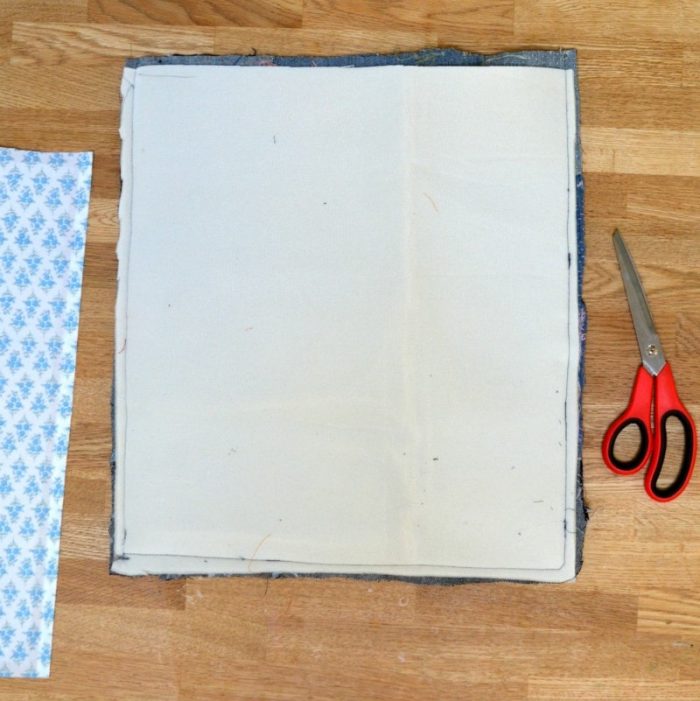
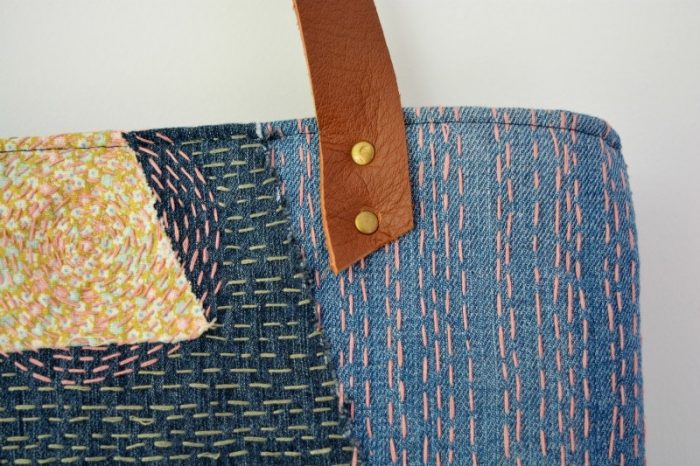
Lay out pieces of denim and cotton patched in a design pleasing to the eye. Ensure your patchwork design is slightly bigger than 16 1/2″ by 18 1/4″ (42 by 46 cm). Hold in place with pins.
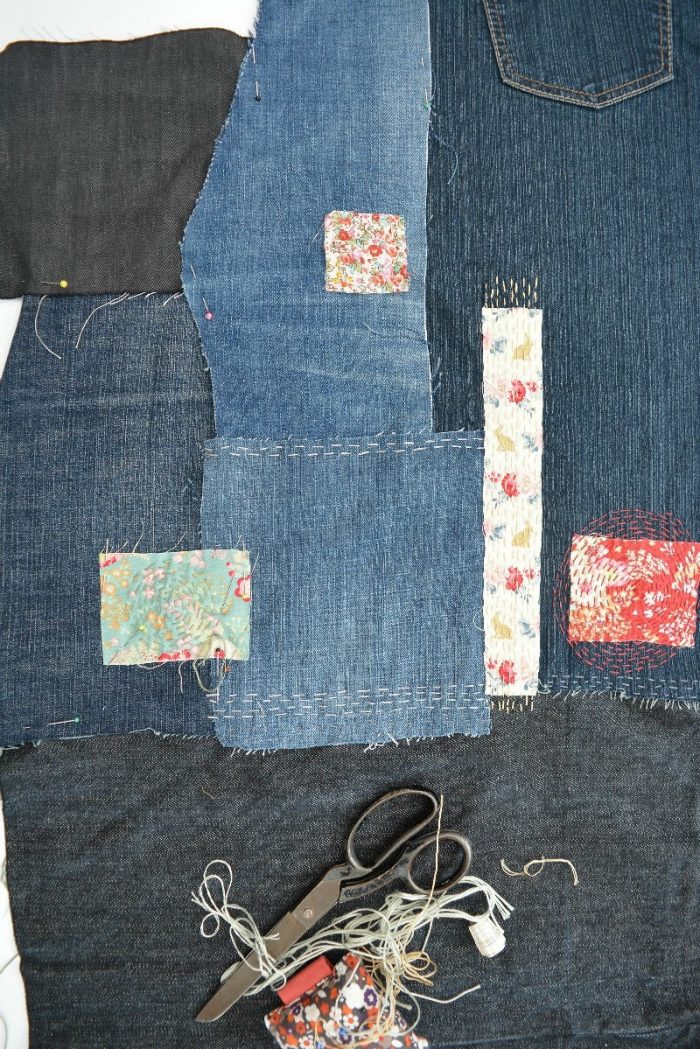
Sashiko Stitching – Hand stitch with running stitch. I have used a split embroidery floss thread so I can have fun with color choice. Alternatively, you can choose to use a traditional sashiko thread. Be creative. Think about the direction of your stitches. The majority of my stitching runs horizontally, however, I have emphasized the cotton patches with circular stitching or vertical stitching.
Repeat for the second side of the bag. Be confident, you can change your mind about thread color choice or direction of stitching.
Once you have completed your two sides use some craft glue spray to adhere the Annies Soft and Stable to the wrong side of each piece. Trim your denim pieces to the edges of Annies Soft and Stable. If you prefer a bag with a more slouchy feel read my post best interfacing for bags.

Place the two sides right sides together. Stitch around the sides and the base. Ensure your seam is 5/8″ (1.5cm) to fully secure Annies Soft and Stable in place.
Box the corners. To do this pull the bottom seam to meet the side seam and pin to hold.
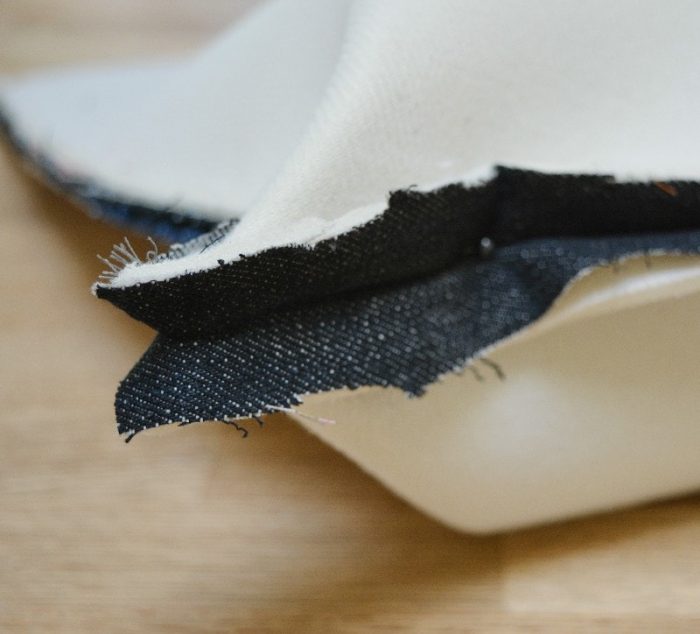
Using a quilting ruler mark a stitch line at right angles to your base. I created the base of the bag as 7″ wide so 3 1/2″ (9cm wide, 4.5cm) either side of the bottom seam.
Read my detailed tutorial for how to box a bag.

Trim the seam allowance. This is the main body of the bag complete.
Lining the Tote Bag
Iron the heavyweight interfacing to the back of the lining fabric.
Prep two slip pockets, 7 by 6″ (17 by 16cm). Cut fabric. Turn over twice the top of the pocket and stitch. Fold and press twice the sides and bottom.
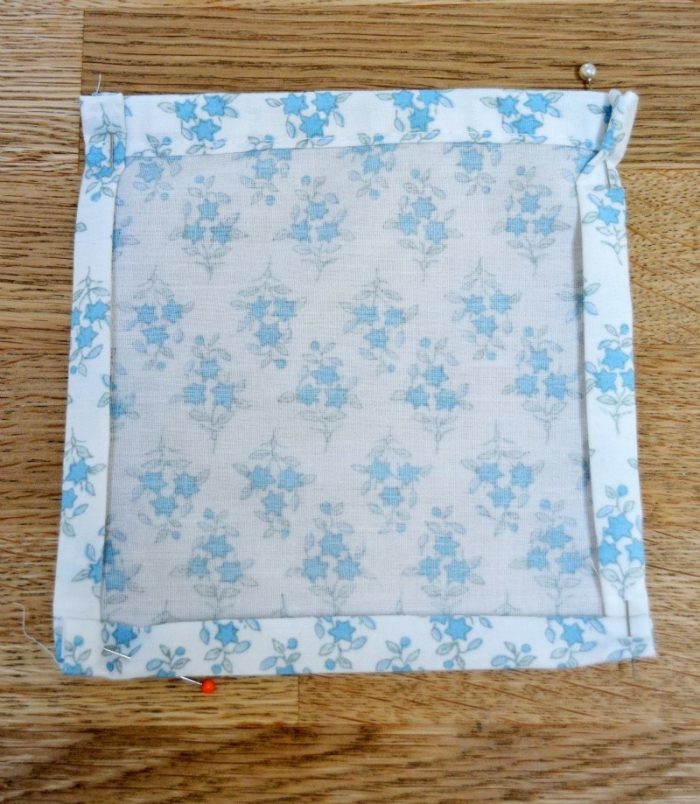
Pin centrally on your lining approximately 3″ (7.6 cm) down from the top of the bag, then stitch.
Insert a magnetic snap, centrally from the top.

Follow steps as for main bag – Stitch the side seams and along the bottom. Ensure you leave a gap for turning out along the bottom seam (I forgot and had to unpick!). Box the corners.
Assemble the Sashiko Denim Tote Bag
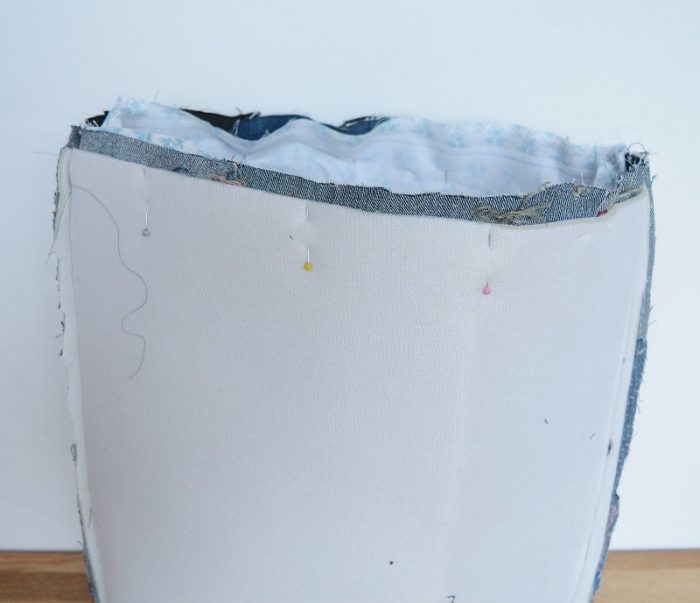
Place the lining inside the denim outer bag so the right sides are together. Pin into place and then stitch along the top.
Due to the bulk, I suggest using a walking foot and a long stitch.
Turn through. Slip stitch the opening in the base seam of the lining.
Topstitch the top of the bag, this will secure the lining and main bag together and strengthen the opening of the bag.
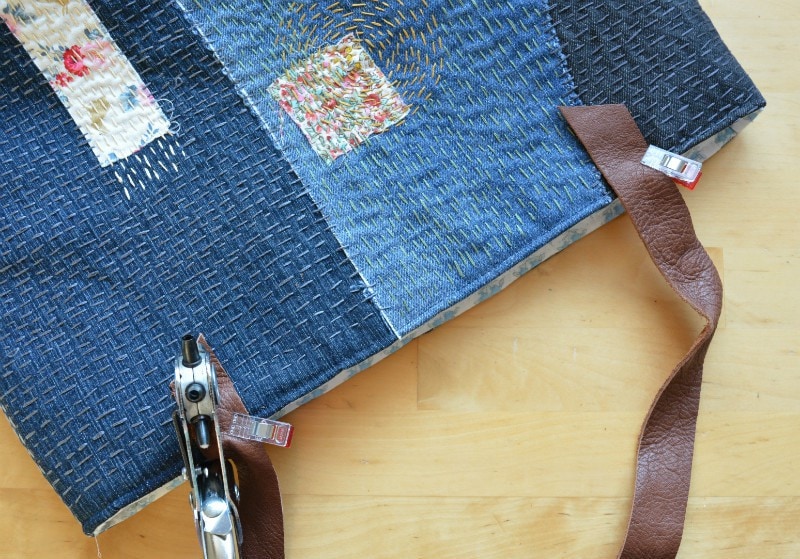
Adding Straps to the Bag
Cut out leather straps measuring 31 by 1″ (79 cm by 2.5cm).

Place on the bag and hold in place with clover clips. Punch two holes per strap with a hole punch and secure the straps in place with cap rivets. Check my detailed tutorial for inserting cap rivets.
I hope you love your sashiko stitching process as much as the finished bag!


Sashiko stitching is such fun, and very versatile – the project easily slips into my handbag for the odd idle moment, watching swimming lessons, etc
If you fancy a smaller Sashiko project check out my zip cosmetic bag. If you would like hints and tips for persuading your sewing machine to sew through denim and Annies Soft and Stable I have produced a handy cheat sheet. Both can be found on my resource page, available to newsletter subscribers.

alicia cross
Sunday 29th of January 2023
have you ever used silk (old silk ties unpicked) for a bag or vest?
Vicky
Sunday 29th of January 2023
I haven't but I know a lot of people love to do that. It would be a lovely memory item made from a loved ones ties.
Evelyn
Wednesday 24th of July 2019
what a beautiful piece of art! I love it!
Linda
Sunday 24th of March 2019
Thank you for your very clear instructions, I’m off to experiment. A couple of years ago I lost 70lbs but couldn’t part with some of my clothes (loved the fabric) now I know how I’m going to repurpose them. Guess what my friends & family are having for Christmas.
Vicky
Sunday 24th of March 2019
Have lots of fun repurposing, personally repurposing allows me to be more creative, as I am not chopping up expensive fabric.