
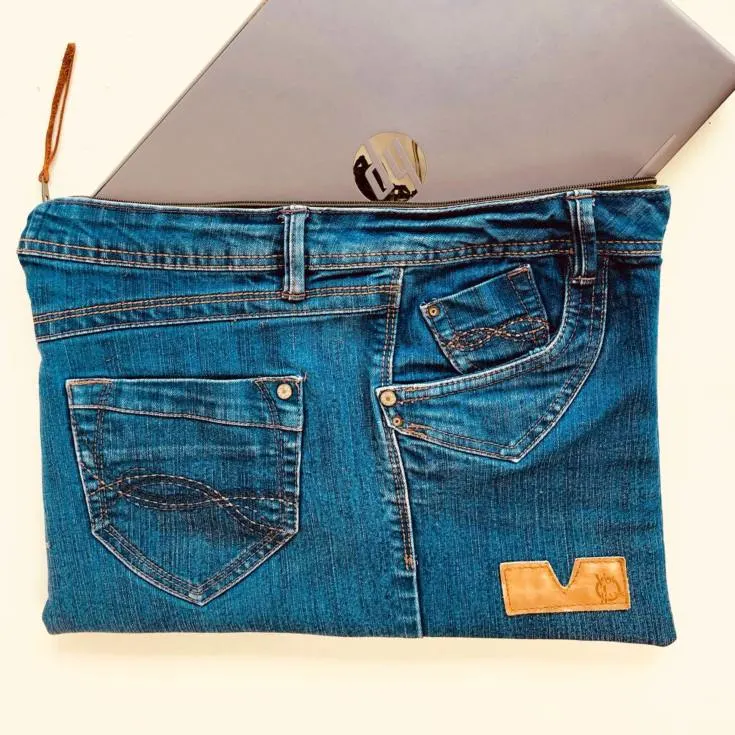
Do you regularly take your laptop out? Work in a coffee shop? This week I whipped up a denim DIY laptop case, perfect for protecting your laptop when out and about.
The laptop case is easy to make and will take less than an hour! Especially if you are not filming yourself as you go! Check out the full video for the denim DIY laptop case .


If you love repurposing denim check out my page packed full of DIY tutorials for denim projects – I love working with old jeans. Be aware that lots of modern jeans are made with a little stretch, those without stretch can be easier to work with but don’t let a little stretch put you off repurposing!
Are looking for ideas for what to do with your old jeans? Check out my 25+ craft ideas for old jeans
Don’t have any old jeans? Ask your friends – I regularly receive donations from friends and family, otherwise, I source from car boot sales (the equivalent of yard sales) and charity shops (thrift stores).
DIY Laptop Case from Old Jeans
Click here to see my disclosure policy.
- Long zip
- Old Jeans
- Fusible Fleece
- Tape measure
- Lining fabric
- Scissors (my husband bought me these scissors last Christmas, by far the best I have owned)
Start by measuring your laptop all the way round. The laptop sleeve needs to accommodate the depth of the laptop as well as the height and width.

Divide your measurements in half and add half an inch. So my laptop measures:-
- width 30 1/2” so my working measurement is 15 1/2”
- depth is 20” working measurements therefore 10 1/2”
This provides the finished case measurements. Cut two pieces of fusible fleece to this size.
Cut the jeans along the crotch. For one side of the case measure down from the waistband, don’t forget to allow seam allowance.

I did this by eye with the laptop or you can measure 11 1/2″. You may wish to use your fusible fleece as a guide plus seam allowance.
For the second side of the laptop case I have used the bottom of a trouser leg (keeping the original hem). Cut out the second side of your denim laptop sleeve.


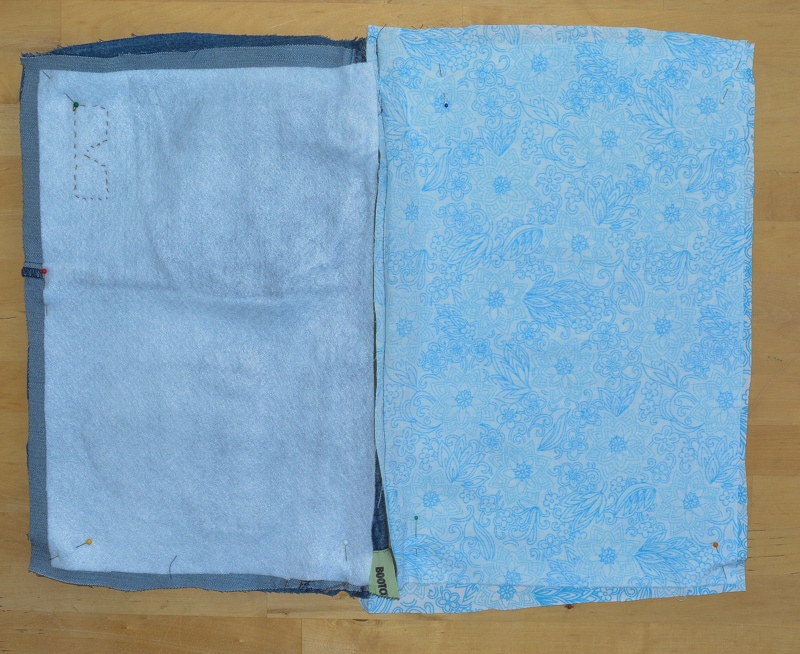
Press your denim. Place your fusible fleece a little bit down from the top of the waistband, on the wrong side. I switch between metric and inches in my head – so this is about 3mm down, so I guess 1/16 ” down from the edge (please tell me I am not the only sewer whose head just switches between metric and imperial?!). Adhere following the manufacturer’s instructions. Trim the seam allowance if required.

If you have a leather label from the waistband of the jeans you may like to add it to the corner of the denim laptop case as a bit of decoration. Ensure the leather label is position a little away from the corner. Hand stitch with a strong thread – I suggest making the ost of the pre-existing holes in the leather label, it will make your hand stitching much easier.

Cut out two pieces of lining fabric, so this is your original measurements plus seam allowance. My finished measurements are 15 1/2 by 10 1/2″ so I cut out 16 by 11″.
Next up the zip – I found a long zip in my stash. To shorten a zip trim the stopper end. Hand stitch over the new end of the zip to stop the zipper accidentally coming off.

Place your zip wrong side up, then your lining wrong side facing you.

Machine stitch the zip in place (you may find this easier with a zipper foot). Press the fabric away from the zip and repeat with the second piece of lining fabric for the opposite edge of the zip.

Turn so the right side of the zip is facing you, place the denim waistband along the edge of the zip (ensuring the lining fabric is pulled flat away from the zip).

Topstitch the denim in place. If your sewing machine struggles swap the zipper foot for a walking foot, lengthen your stitch length and stitch slowly. If your denim has any seams to sew over a jig really helps. Check out my video How to sew denim.
Repeat for the second side with the denim hem placed along the edge of the zip.
Unzip your zip halfway – this is essential, don’t skip it otherwise you won’t be able to turn your bag right side out.
Place the right sides of the denim facing each other, and the right sides of the lining facing each other. Ensure the zip aligns.
Starting a couple of inches in from the edge machine stitch from the bottom of the lining all around the bag, leaving a turning gap of 6” in the lining.
Trim the corners of the denim and the lining, being careful not to cut into the stitches. Turn right side out.
Check your laptop fits then fold in the raw edges of the lining and topstitch to close.

Super quick and easy!

Recently I have made a leather tassel for the zipper pull – tassels are a great way of jazzing up your bags. Check out my post how to make tasels.


If you love upcycling, reusing and repurposing, sewing then sign up to my fortnightly newsletter. Subscribers have access to my resource library packed with ad free PDF of popular bag patterns.
DIY Laptop Case

Make yourself a unique laptop case, which fits your make and model. Repurpose your old jeans to create a fun protective case.
Materials
- Old Jeans
- Long Zip
- Fusible Fleece
- Lining fabric (old sheet or similar)
Tools
- Sewing Machine
- Walking Foot or Zipper Foot
- Denim Sewing Machine Needle
Instructions
- Measure your laptop
- Cut out two pieces of fusible fleece the size of the finished laptop case
- Cut out the jeans, waistband for the top of one side, the hem of the trouser leg for the second side
- Cut out the lining fabric
- Place the lining fabric along the edge of zip, the right side of the fabric facing the wrong side of the zip.
- Stitch the zip, repeat for the second side.
- Place denim edge along the right side of the zip and stitch
- Open the zip part way.
- Open out the fabric, denim pieces facing each other, lining pieces facing each other
- Stitch all around leaving a turning gap in lining fabric.
- Pull right side out, stitch the turning gap to close.


jason
Sunday 13th of October 2019
Such a great work.